Connect With Me In Facebook

Welcome to DefendHackers, If u want to Apply for a Blogroll as a Author , With h4ckfreak Mail me @ suren.click@gmail.com

Mark Zuckerberg tells 8th graders “there’s no shortcuts” and to make friends

By h4ckfreak

Metasploit Quick Start Referennce Guide

Metasploit Quick Start Referennce Guide , By h4ckfreak

IP Security

IP Security By H4ckfreak.

15 Network Admin Apps for Android

15 Network Admin Apps for Android , By h4ckfreak

Break All OS Passwords Using KON

Break All OS Passwords Using KON , By h4ckfreak

Recover Or Reset Ur Windows Pwd Using Ubuntu

Recover Or Reset Ur Windows Pwd Using Ubuntu , By h4ckfreak

Security Blueprint For Ethical Hackers..

By h4ckfreak

Blocking IP Using IPSec

By h4ckfreak

Preventing DDos Attacks, Combat Steps abd Tools...

By h4ckfreak

Friday, March 30, 2012

Malware Analysics (Screenshots) - URL Redirection

Today lets have deeper Insight of Malware Analysics with Mindset of FORENSIC INVESTIGATOR !Alrite JUMP IN !!!

(SHA1: fbe71968d4c5399c2906b56d9feadf19a35beb97, detected as TrojanDropper:Win32/Vundo.L). This trojan hijacks  the hosts “vk.com” and “vkontakte.ru” (both social networking sites in Russia)and redirects them to 92.38.209.252, but achieves this in an unusual way.

A common  method used to hijack a website and redirect it to a site of the attacker’s choice is to add an entry in the Windows hosts file located in the %SystemRoot%\system32\drivers\etc directory.
However, when we open this file on an affected computer, it doesn’t contain any entries related to “vk.com” and “vkontakte.ru”, as you can see in the following example:

 
But when we show hidden files, we can see another “hosts” file. It is hidden, as in the following example


There are two files with exactly the same name, “hosts”, in the etc directory! How can this happen?
As we know, it is not possible for a directory to contain two files with the same name.


Think ..!! Think ,...!!

When we copy the file names to notepad, save them as a Unicode text file and open them with a hex editor we see the following (the upper is for the first “hosts” file, the lower is for the second “hosts” file)


Technical Informataion :

For Unicode (UTF-16), the 0x006F is the same as 0x6F in ASCII, which is the character “o”. But what’s the 0x043E in Unicode? We can find it in Unicode chart table (Range: 0400-04FF). The following is part of this table.


So Now ,

We can see that Unicode 0x043E is a Cyrillic character, and it looks very much like the English character “o”.
So the hidden “hosts” file is the real hosts file in fact. When we open this file, we can see that two entries have been added to the end of the file:


Mystery solved!
This is not the first time we’ve seen a hacker using Unicode characters to mislead people. In Aug 2010, a Chinese hacker disclosed a trick with a Unicode control character used to mislead people into running an executable file. Hackers use Unicode control characters 0x202E (RLO) to reverse parts of a special file name, which changes the look of the file name in Windows Explorer.
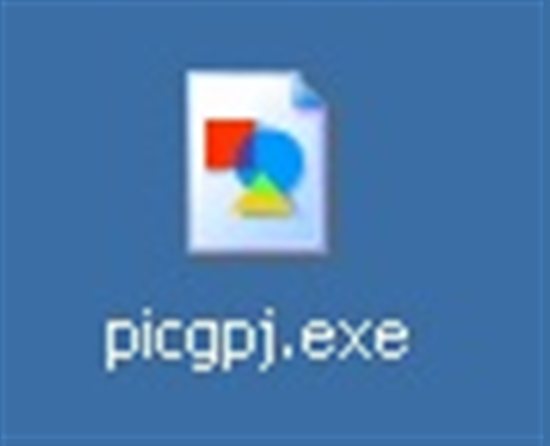
For example, there is a file named as “picgpj.exe”, as the following:


 The “gpj.exe” part of this name is specially crafted. When inserting an RLO character before “gpj.exe” in this name, the whole name appears as the following:


Hackers also usually use a picture as the file icon. Unwary people treat this file as a picture, and blindly double-click to open it, thus running the executable. Obviously, this type of trick is useless for Unicode aware programs, but it is not easy for the eyes of people to identify the problem.
Can we believe our eyes? The answer is... not always.


H@CKFR3AK

Sunday, March 18, 2012

Setup a Tor relay or Tor bridge to help Censorship Country Users

For those in Iran. Here is a guide in Farsi for installing Tor so you can surf the web without censorship: http://greenoolo.pieceoftheworld.org/


IMPORTANT UPDATE (23/06/09): New email addresses have been added, and others updated. If you have Tor setup in bridge mode, resend your connection information to us.


IMPORTANT UPDATE #2: When posting in the comments section do not post your normal email address, do not use your name/alias (make up a new one) or post other personally identifiable information. This is very important.
UPDATE: slseveral sends this interesting read: http://blog.torproject.org/blog/measuring-tor-and-iran That might ease those wondering if we’re actually helping :)

What is Tor? (from https://www.torproject.org/) “Tor protects you by bouncing your communications around a distributed network of relays run by volunteers all around the world: it prevents somebody watching your Internet connection from learning what sites you visit, and it prevents the sites you visit from learning your physical location. Tor works with many of your existing applications, including web browsers, instant messaging clients, remote login, and other applications based on the TCP protocol.”
This is something of great value to our friends in Iran.
Get Tor
https://www.torproject.org/easy-download.html.en
and install (detailed instructions Windows, Os X) (short version: double click install file)

Relay or Bridge? A relay will be a proxy in the Tor network and help speed up the network for the people using it – a bridge, on the other hand, will enable people to reach the Tor network if the relays are blacklisted.
If you setup a bridge, you will need to get its address to the people that are going to use it (more on that later. Short: do not post it publicly, like in the comments below).
IMPORTANT: We’re going to need both sorts (mostly relays though), so please answer the poll (at the end) on which type you’ve set up. And if the type doesn’t matter to you, please check the poll to see how others have chosen and balance it up.

Relay: (from https://www.torproject.org/docs/tor-doc-relay.html.en#setup)
  • Right click on the Vidalia icon in your task bar. Choose Control Panel.
  • Click Setup Relaying.
  • Choose Relay Traffic for the Tor network.
  • Enter a nickname for your relay. (Optional, enter contact information.)
  • Change ports from the default ports (needs to be >1024 on Os X and Linux/Unix)
  • If you have UPnP: Choose Attempt to automatically configure port forwarding. Push the Test button to see if it works. If it does work, great. If not, see “Firewall/router” below.
  • Choose the Bandwidth Limits tab. Select how much bandwidth you want to provide for Tor users like yourself.
  • Choose the Exit Policies tab. If you want to allow others to use your relay for these services, don’t change anything. Un-check the services you don’t want to allow through your relay. If you want to be a non-exit relay, un-check all services.
  • Click the Ok button. See “Check if it works” below for confirmation that the relay is working correctly.
Firewall/Router:
If you are using a firewall, open a hole in your firewall/router so incoming connections can reach the ports you configured (Relay Port (plus Directory Port if you enabled it)). Make sure you allow all outgoing connections, so your relay can reach the other Tor relays.
Check if it works:
Restart your relay. If it logs any warnings, address them. Look at the updates at the end of the post for help resolving issues that arise.
As soon as your relay manages to connect to the network, it will try to determine whether the ports you configured are reachable from the outside. This may take up to 20 minutes. Look for a log entry like Self-testing indicates your ORPort is reachable from the outside. Excellent. If you don’t see this message, it means that your relay is not reachable from the outside — you should re-check your firewalls, check that it’s testing the IP and port you think it should be testing, etc.
Problems?
And now what?
Well, congratulations, this is it. People can now surf the internet without fear of filtering/blocking or surveillance. Collect your karma points and continue following https://twitter.com/#search?q=%23IranElection or http://www.huffingtonpost.com/2009/06/13/iran-demonstrations-viole_n_215189.html

Bridge:
  • Right click on the Vidalia icon in your task bar. Choose Control Panel.
  • Click Setup Relaying.
  • Click Help censored users reach the Tor network
  • Enter a nickname for your relay. (Optional, enter contact information.)
  • Change ports from the default ports (needs to be >1024 on Os X and Linux/Unix)
  • If you have UPnP: Choose Attempt to automatically configure port forwarding. Push the Test button to see if it works. If it does work, great. If not, see “Firewall/router” below.
  • Choose the Bandwidth Limits tab. Select how much bandwidth you want to provide for Tor users like yourself.
  • Click the Ok button. See “Check if it works” below for confirmation that the bridge is working correctly.
  • Now scroll down to “Get the address to those that need it” and follow the instructions. Do NOT publish your connection information in the comments.
Firewall/Router:
If you are using a firewall, open a hole in your firewall/router so incoming connections can reach the ports you configured (Relay Port (plus Directory Port if you enabled it)). Make sure you allow all outgoing connections, so your relay can reach the other Tor relays.
Check if it works:
Restart your bridge. If it logs any warnings, address them. Look at the updates at the end of the post for help resolving issues that arise.
As soon as your bridge manages to connect to the network, it will try to determine whether the ports you configured are reachable from the outside. This may take up to 20 minutes. Look for a log entry like Self-testing indicates your ORPort is reachable from the outside. Excellent. If you don’t see this message, it means that your relay is not reachable from the outside — you should re-check your firewalls, check that it’s testing the IP and port you think it should be testing, etc.
Problems?
Get that address to those that need it (IMPORTANT)
After successfully setting up the bridge, click “Setup Relay” and you will see your IP port and a string of chars, this is your bridge address.
Your bridge address is not posted publicly, you need to get it to those that need it.
Email this bridge address to anonygreen@gmail.com, gr88proxies@googlegroups.com, tor@austinheap.com, irancurtain@iansbrain.com and protesterhelp@gmail.com or Direct Message (private message) in Twitter to @iran09, @austinheap, @protesterhelp, @persiankiwi or @stopahmadi. If you email be sure to include “Tor bridge” in the subject line.

And now what? Well, congratulations, this is it. People can now surf the internet without fear of filtering/blocking or surveillance. Collect your karma points and continue following https://twitter.com/#search?q=%23IranElection or http://www.huffingtonpost.com/2009/06/13/iran-demonstrations-viole_n_215189.html

Poll:
Which type have you set up? (please, only answer this when you have a working relay/bridge)
Quantcast

Update 1:
GeoIP error:

Ian Says:
19th June, 2009 at 02:38 |
download this http://git.torproject.org/checkout/tor/master/src/config/geoip and put it in C:\Documents and Settings\{username}\Application Data\Tor\
Open ports in the router:

Carl Says:
21st June, 2009 at 13:01 |
Then you need to forward that port from your router to your computer.
See: http://portforward.com/ for info and howto:s
Update2:
DNS hijacking
:
From David and slseveral:
http://dnsresolvers.com/ got me past the hijacking errors (Verizon FIOS DNS servers.)
Update3:
DIR Port not reachable, but OR port is.

Boogs says:
“THE SOLUTION, at least for me, was to download the latest unstable version at http://www.torproject.org/download.html.en and presto, now everything works just like it should. There must be a bug in the latest stable version.”

How can you help, 2nd edition. Talk to friends and spread the word of the Iranian struggle for freedom. Refer them to this guide if you think it was good.
If you know Farsi, please help translate
https://www.torproject.org/docs/tor-doc-windows.html.en
https://www.torproject.org/docs/tor-doc-osx.html.en

Sunday, March 11, 2012

Attention ! We`re Attacking FB from May 1St -By Anonymous


Attention citizens of the world, We are anonymous. The popular social network face book is in the midst of an alternative and long awaited event. Members of anonymous have decide it's time to show the face book corporation and the people of the world that the website is in fact vulnerable and that it's possible to be taken down with little effort. There has been multiple releases of face book related operations but none of them have actually had much of an effect, if any. Unlike the other video's we aren't going to bullshit the public about worthless denile of service attacks against face book, in the very near future anonymous will target face books main server farm in an attempt to cripple the root service computers, power supply system and data systems that control the basic web servers.


This inevitable cyber assault will take place on may the first two thousand and twelve. We will not stop until we have succeeded, we will finally kill face book forever and no one is going to stop us. for too long face book has controlled and manipulated its users, and on this historic yet anarchic day anonymous will prove to the world, that we are no longer playing. We hope, almost pray that you heed this warning. face book the game is over, anonymous wins. on may the first two thousand and 12 face book will systematically fail. We are anonymous, we are legion, we do not forget, we do not forgive, face book, expect us.


LULZ We DDoS'd Facebook https://www.youtube.com/watch?v=p1g6I3h6XBM

https://twitter.com/#!/FawkesSecurity
https://www.facebook.com/FawkesS3curity
https://www.facebook.com/groups/160102654090712/ fawkes_security@hotmail.com
WE ARE ANONYMOUS
WE ARE LEGION
WE DO NOT FORGIVE
WE DO NOT FORGET
EXPECT US.


By
h@ckfr3ak

Saturday, March 10, 2012

WCE v1.3beta 32bit released. (Must needed for Admins)


Download link: http://www.ampliasecurity.com/research/wce_v1_3beta.tgz


Changelog:

version 1.3beta:
March 8, 2012
* Bug fixes
* Extended support to obtain NTLM hashes without code injection
* Added feature to dump login cleartext passwords stored by the Digest
Authentication package


Example:

* Dump cleartext passwords stored by the Digest Authentication package

C:\>wce -w
WCE v1.3beta (Windows Credentials Editor) - (c) 2010,2011,2012 Amplia
Security -
by Hernan Ochoa (hernan@ampliasecurity.com)
Use -h for help.


test\MYDOMAIN:mypass1234
NETWORK SERVICE\WORKGROUP:test


The cleartext passwords dumped include passwords used to login to the
Windows box interactively.

What is WCE?
------------

Windows Credentials Editor (WCE) v1.3beta allows you to

NTLM authentication:

* List logon sessions and add, change, list and delete associated
credentials (e.g.: LM/NT hashes)
* Perform pass-the-hash on Windows natively
* Obtain NT/LM hashes from memory (from interactive logons, services,
remote desktop connections, etc.) which can be
used to authenticate to other systems. WCE can perform this task without
injecting code, just by reading and decrypting information stored in
Windows internal memory structures. It also has the capability to
automatically switch to code injection when the aforementioned method
cannot be performed

Kerberos authentication:

* Dump Kerberos tickets (including the TGT) stored in Windows machines
* Reuse/Load those tickets on another Windows machines, to authenticate
to other systems and services
* Reuse/Load those tickets on *Unix machines, to authenticate to other
systems and services

Digest Authentication:

* Obtain cleartext passwords entered by the user when logging into a
Windows system, and stored by the Windows Digest Authentication security
package


Supported Platforms
-------------------
Windows Credentials Editor supports Windows XP, 2003, Vista, 7 and 2008.


Additional information
----------------------
http://www.ampliasecurity.com/research/wcefaq.html


Thanks,

h@ckfr3ak

Exploring all DNS Records using DIG Commands

Using dig command you can query DNS name servers for your DNS lookup related tasks. This article explains 10 examples on how to use dig command.

1. Simple dig Command Usage (Understand dig Output)

When you pass a domain name to the dig command, by default it displays the A record (the ip-address of the site that is queried) as shown below.

In this example, it displays the A record of redhat.com in the “ANSWER SECTION” of the dig command output.
$ dig redhat.com

; <<>> DiG 9.7.3-RedHat-9.7.3-2.el6 <<>> redhat.com
;; global options: +cmd
;; Got answer:
;; ->>HEADER<<- opcode: QUERY, status: NOERROR, id: 62863
;; flags: qr rd ra; QUERY: 1, ANSWER: 1, AUTHORITY: 4, ADDITIONAL: 3

;; QUESTION SECTION:
;redhat.com.                    IN      A

;; ANSWER SECTION:
redhat.com.             37      IN      A       209.132.183.81

;; AUTHORITY SECTION:
redhat.com.             73      IN      NS      ns4.redhat.com.
redhat.com.             73      IN      NS      ns3.redhat.com.
redhat.com.             73      IN      NS      ns2.redhat.com.
redhat.com.             73      IN      NS      ns1.redhat.com.

;; ADDITIONAL SECTION:
ns1.redhat.com.         73      IN      A       209.132.186.218
ns2.redhat.com.         73      IN      A       209.132.183.2
ns3.redhat.com.         73      IN      A       209.132.176.100

;; Query time: 13 msec
;; SERVER: 209.144.50.138#53(209.144.50.138)
;; WHEN: Thu Jan 12 10:09:49 2012
;; MSG SIZE  rcvd: 164
The dig command output has the following sections:
  • Header: This displays the dig command version number, the global options used by the dig command, and few additional header information.
  • QUESTION SECTION: This displays the question it asked the DNS. i.e This is your input. Since we said ‘dig redhat.com’, and the default type dig command uses is A record, it indicates in this section that we asked for the A record of the redhat.com website
  • ANSWER SECTION: This displays the answer it receives from the DNS. i.e This is your output. This displays the A record of redhat.com
  • AUTHORITY SECTION: This displays the DNS name server that has the authority to respond to this query. Basically this displays available name servers of redhat.com
  • ADDITIONAL SECTION: This displays the ip address of the name servers listed in the AUTHORITY SECTION.
  • Stats section at the bottom displays few dig command statistics including how much time it took to execute this query

2. Display Only the ANSWER SECTION of the Dig command Output

For most part, all you need to look at is the “ANSWER SECTION” of the dig command. So, we can turn off all other sections as shown below.
  • +nocomments – Turn off the comment lines
  • +noauthority – Turn off the authority section
  • +noadditional – Turn off the additional section
  • +nostats – Turn off the stats section
  • +noanswer – Turn off the answer section (Of course, you wouldn’t want to turn off the answer section)
The following dig command displays only the ANSWER SECTION.
$ dig redhat.com +nocomments +noquestion +noauthority +noadditional +nostats

; <<>> DiG 9.7.3-RedHat-9.7.3-2.el6 <<>> redhat.com +nocomments +noquestion +noauthority +noadditional +nostats
;; global options: +cmd
redhat.com.             9       IN      A       209.132.183.81
Instead of disabling all the sections that we don’t want one by one, we can disable all sections using +noall (this turns off answer section also), and add the +answer which will show only the answer section.
The above command can also be written in a short form as shown below, which displays only the ANSWER SECTION.
$ dig redhat.com +noall +answer

; <<>> DiG 9.7.3-RedHat-9.7.3-2.el6 <<>> redhat.com +noall +answer
;; global options: +cmd
redhat.com.             60      IN      A       209.132.183.81

3. Query MX Records Using dig -t MX

To query MX records, pass MX as an argument to the dig command as shown below.
$ dig redhat.com  MX +noall +answer

; <<>> DiG 9.7.3-RedHat-9.7.3-2.el6 <<>> redhat.com MX +noall +answer
;; global options: +cmd
redhat.com.             513     IN      MX      5 mx1.redhat.com.
redhat.com.             513     IN      MX      10 mx2.redhat.com.
You can also use option -t to pass the query type (for example: MX) as shown below.
$ dig -t MX redhat.com +noall +answer

; <<>> DiG 9.7.3-RedHat-9.7.3-2.el6 <<>> -t MX redhat.com +noall +answer
;; global options: +cmd
redhat.com.             489     IN      MX      10 mx2.redhat.com.
redhat.com.             489     IN      MX      5 mx1.redhat.com.

4. Query NS Records Using dig -t NS

To query the NS record use the type NS as shown below.
$ dig redhat.com NS +noall +answer

; <<>> DiG 9.7.3-RedHat-9.7.3-2.el6 <<>> redhat.com NS +noall +answer
;; global options: +cmd
redhat.com.             558     IN      NS      ns2.redhat.com.
redhat.com.             558     IN      NS      ns1.redhat.com.
redhat.com.             558     IN      NS      ns3.redhat.com.
redhat.com.             558     IN      NS      ns4.redhat.com.
You can also use option -t to pass the query type (for example: NS) as shown below.
$ dig -t NS redhat.com +noall +answer

; <<>> DiG 9.7.3-RedHat-9.7.3-2.el6 <<>> -t NS redhat.com +noall +answer
;; global options: +cmd
redhat.com.             543     IN      NS      ns4.redhat.com.
redhat.com.             543     IN      NS      ns1.redhat.com.
redhat.com.             543     IN      NS      ns3.redhat.com.
redhat.com.             543     IN      NS      ns2.redhat.com.

5. View ALL DNS Records Types Using dig -t ANY

To view all the record types (A, MX, NS, etc.), use ANY as the record type as shown below.
$ dig redhat.com ANY +noall +answer

; <<>> DiG 9.7.3-RedHat-9.7.3-2.el6 <<>> redhat.com ANY +noall +answer
;; global options: +cmd
redhat.com.             430     IN      MX      5 mx1.redhat.com.
redhat.com.             430     IN      MX      10 mx2.redhat.com.
redhat.com.             521     IN      NS      ns3.redhat.com.
redhat.com.             521     IN      NS      ns1.redhat.com.
redhat.com.             521     IN      NS      ns4.redhat.com.
redhat.com.             521     IN      NS      ns2.redhat.com.
(or) Use -t ANY
$ dig -t ANY redhat.com  +noall +answer

; <<>> DiG 9.7.3-RedHat-9.7.3-2.el6 <<>> -t ANY redhat.com +noall +answer
;; global options: +cmd
redhat.com.             367     IN      MX      10 mx2.redhat.com.
redhat.com.             367     IN      MX      5 mx1.redhat.com.
redhat.com.             458     IN      NS      ns4.redhat.com.
redhat.com.             458     IN      NS      ns1.redhat.com.
redhat.com.             458     IN      NS      ns2.redhat.com.
redhat.com.             458     IN      NS      ns3.redhat.com.

6. View Short Output Using dig +short

To view just the ip-address of a web site (i.e the A record), use the short form option as shown below.
$ dig redhat.com +short
209.132.183.81
You can also specify a record type that you want to view with the +short option.
$ dig redhat.com ns +short
ns2.redhat.com.
ns3.redhat.com.
ns1.redhat.com.
ns4.redhat.com.

7. DNS Reverse Look-up Using dig -x

To perform a DNS reverse look up using the ip-address using dig -x as shown below
For example, if you just have an external ip-address and would like to know the website that belongs to it, do the following.
$ dig -x 209.132.183.81 +short
www.redhat.com.
To view the full details of the DNS reverse look-up, remove the +short option.
$ dig -x 209.132.183.81

; <<>> DiG 9.7.3-RedHat-9.7.3-2.el6 <<>> -x 209.132.183.81
;; global options: +cmd
;; Got answer:
;; ->>HEADER<<- opcode: QUERY, status: NOERROR, id: 62435
;; flags: qr rd ra; QUERY: 1, ANSWER: 1, AUTHORITY: 4, ADDITIONAL: 3

;; QUESTION SECTION:
;81.183.132.209.in-addr.arpa.   IN      PTR

;; ANSWER SECTION:
81.183.132.209.in-addr.arpa. 600 IN     PTR     www.redhat.com.

;; AUTHORITY SECTION:
183.132.209.in-addr.arpa. 248   IN      NS      ns2.redhat.com.
183.132.209.in-addr.arpa. 248   IN      NS      ns1.redhat.com.
183.132.209.in-addr.arpa. 248   IN      NS      ns3.redhat.com.
183.132.209.in-addr.arpa. 248   IN      NS      ns4.redhat.com.

;; ADDITIONAL SECTION:
ns1.redhat.com.         363     IN      A       209.132.186.218
ns2.redhat.com.         363     IN      A       209.132.183.2
ns3.redhat.com.         363     IN      A       209.132.176.100

;; Query time: 35 msec
;; SERVER: 209.144.50.138#53(209.144.50.138)
;; WHEN: Thu Jan 12 10:15:00 2012
;; MSG SIZE  rcvd: 193

8. Use a Specific DNS server Using dig @dnsserver

By default dig uses the DNS servers defined in your /etc/resolv.conf file.
If you like to use a different DNS server to perform the query, specify it in the command line as @dnsserver.
The following example uses ns1.redhat.com as the DNS server to get the answer (instead of using the DNS servers from the /etc/resolv.conf file).
$ dig @ns1.redhat.com redhat.com

; <<>> DiG 9.7.3-RedHat-9.7.3-2.el6 <<>> @ns1.redhat.com redhat.com
; (1 server found)
;; global options: +cmd
;; Got answer:
;; ->>HEADER<<- opcode: QUERY, status: NOERROR, id: 20963
;; flags: qr aa rd; QUERY: 1, ANSWER: 1, AUTHORITY: 4, ADDITIONAL: 4
;; WARNING: recursion requested but not available

;; QUESTION SECTION:
;redhat.com.                    IN      A

;; ANSWER SECTION:
redhat.com.             60      IN      A       209.132.183.81

;; AUTHORITY SECTION:
redhat.com.             600     IN      NS      ns1.redhat.com.
redhat.com.             600     IN      NS      ns4.redhat.com.
redhat.com.             600     IN      NS      ns3.redhat.com.
redhat.com.             600     IN      NS      ns2.redhat.com.

;; ADDITIONAL SECTION:
ns1.redhat.com.         600     IN      A       209.132.186.218
ns2.redhat.com.         600     IN      A       209.132.183.2
ns3.redhat.com.         600     IN      A       209.132.176.100
ns4.redhat.com.         600     IN      A       209.132.188.218

;; Query time: 160 msec
;; SERVER: 209.132.186.218#53(209.132.186.218)
;; WHEN: Thu Jan 12 10:22:11 2012
;; MSG SIZE  rcvd: 180

9. Bulk DNS Query Using dig -f (and command line)

Query multiple websites using a data file:

You can perform a bulk DNS query based on the data from a file.
First, create a sample names.txt file that contains the website that you want to query.
$ vi names.txt
redhat.com
centos.org
Next, execute dig -f as shown below, which will perform DNS query for the websites listed in the names.txt file and display the output.
$ dig -f names.txt +noall +answer
redhat.com.             60      IN      A       209.132.183.81
centos.org.             60      IN      A       72.232.194.162
You can also combine record type with the -f option. The following example displays the MX records of multiple websites that are located in the names.txt file.
$ dig -f names.txt MX +noall +answer
redhat.com.             600     IN      MX      10 mx2.redhat.com.
redhat.com.             600     IN      MX      5 mx1.redhat.com.
centos.org.             3600    IN      MX      10 mail.centos.org.

Query multiple websites from dig command line:

You can also query multiple websites from the dig command line as shown below. The following example queries MX record for redhat.com, and NS record for centos.org from the command line
$ dig redhat.com mx +noall +answer centos.org ns +noall +answer

; <<>> DiG 9.7.3-RedHat-9.7.3-2.el6 <<>> redhat.com mx +noall +answer centos.org ns +noall +answer
;; global options: +cmd
redhat.com.             332     IN      MX      10 mx2.redhat.com.
redhat.com.             332     IN      MX      5 mx1.redhat.com.
centos.org.             3778    IN      NS      ns3.centos.org.
centos.org.             3778    IN      NS      ns4.centos.org.
centos.org.             3778    IN      NS      ns1.centos.org.

10. Use $HOME/.digrc File to Store Default dig Options

If you are always trying to view only the ANSWER section of the dig output, you don’t have to keep typing “+noall +answer” on your every dig command. Instead, add your dig options to the .digrc file as shown below.
$ cat $HOME/.digrc
+noall +answer
Now anytime you execute dig command, it will always use +noall and +answer options by default. Now the dig command line became very simple and easy to read without you have to type those options every time.
$ dig redhat.com
redhat.com.             60      IN      A       209.132.183.81

$ dig redhat.com MX
redhat.com.             52      IN      MX      5 mx1.redhat.com.
redhat.com.             52      IN      MX      10 mx2.redhat.com.

NSA opens massive cryptologic center in Georgia

The National Security Agency/Central Security Service officially opened the new NSA/CSS Georgia Cryptologic Center.

The $286 million complex will provide cryptologic professionals with the latest state-of-the-art tools to conduct signals intelligence operations, train the cryptologic workforce, and enable global communications.


NSA/CSS has had a presence in Georgia for over 16 years on Ft. Gordon, when only 50 people arrived to establish one of NSA’s Regional Security Operations Centers.

“This new facility will allow the National Security Agency to work more effectively and efficiently in protecting our homeland,” said Sen. Saxby Chambliss. “It will also attract more jobs to the Augusta area. The opening of this complex means that Georgians will play an even greater role in ensuring the safety and security of our nation.”

The new NSA/CSS Georgia Cryptologic Center is another step in the NSA’s efforts to further evolve a cryptologic enterprise that is resilient, agile, and effective to respond to the current and future threat environment.

NSA/CSS opened a new facility in Hawaii in January 2012 and is also upgrading the cryptologic centers in Texas and Denver to make the agency’s global enterprise even more seamless as it confronts the increasing challenges of the future.

Get paid 100USD From Amazon, Just do this Survey in Web App Security


So Long time Not blogging at all, since from the day i signed for my CCNA and CCNP Classess, Course are going are pretty good learned a lot with hand on with cisco routers and switches now am back on with some serious deal Here its

if u are a Pen tester or Web App security consultant here its for u, Just answer fr this 25 questions and u could be a lucky winner to win 100USD From amazon


Some of the questions can be perceived as difficult to answer. However, if all this data was known, or easy to identify, there would be no reason to gather estimates on the topic. Consequently, we ask that you complete this survey and provide us with your beliefs and best estimates, even if you are uncertain about the answer to the questions asked. Also, the answer format will enable you to account for this uncertainty.

By completing this survey you will:

  • Help the community to quantify the effort required to find vulnerabilities in web applications.
  • Be able to compare your answers to the answers of others.
  • Have a chance to win a 100 USD gift certificate on Amazon.
The survey consists of 24 questions spread out over 8 pages (this page being the first). After completing the survey you will receive a link that displays your answers and compares them to aggregates of all answers received. The survey will remain active until the 22nd of March 2012.


If you have cookies enabled you will be able to use this browser to return to an uncompleted survey for two weeks. In other cases, the below link can be used to return to your survey at any point in time until the survey closes.
Permanent link to your survey: http://surveys.ics.kth.se/WASecurity/?respondent=088414147114D13BF8FB68D58621B20C


Wednesday, March 7, 2012

Unlocking cmd.exe Locked by Admin

Running a Locked cmd.exe


First Way

  • Open up 'Notepad' or a similar text editor.
  • Type in "start" with no quotations.
  • Save it as a .bat file. i.e. fakecmd.exe
  • Double-click it to run.
That's the easiest way, but not always guaranteed to work. Here's a better way that will work

Second Way

  • Open up your text editor.
  • Put the following:
    Code:
    @echo off
      command
      comand.com
      pause
  • Save it as a .bat file
  • Double-click it, and voila!
Now that I had that going, I was able to gain access to all of the C: drive. I then ran a net user batch file and added my user to the admin group giving me full control. I was tempted to format and install Ubuntu but decided not to. Didn't want to get arrested and go to jail for destroying government property. It was fun tho.

Anyway, that's about it, enjoy.

Changing Admin password

Ok, here we go.

First off, this might not work, depends on if the computer is correctly protected or not.
Second, if you do have the download power and time you will want to go to the previous thread and learn from that dude because he knows what he is doing. I am pretty sure everyone here knows how to do this trick but if you dont you might want to learn it.

I will start off with the unprotected kind of computer. You goto the start button and click on the icon/button on the lower-right hand corner that says "run". Type in the letters "cmd" or "command", both will work for this trick but be warned, they are different. Once you see the otherwise customized black and white lettering screen, you know that you typed it in right . Next, you type in the words "net users" or "net user", they are the same. Once the command completes, you will see a screen that lists all the users on the computer. Make sure you see your target user, because if you dont then you might be connected through a different server (which makes it a little more complicated ). Once you see your target user, type the words "net user [target] *". Make sure you include a space between the user and the astarix*, otherwise the command might not work correctly. Type in the SAME password for both fields, but you will not see what you are typing. Push enter to go from the first field to the second field and enter again to go from the second field to finishing the command. If the words "The command completed successfully." pop-up on the screen, the password has been changed into the password you typed, without the original password !

Ok, now we move onto the more protected computer . Some computers, such as school computers, do not have the run button on the start menu. In these cases, you need to do different ways (such as what I have done to my school computer ). First, you need to make sure you have notepad. If you see the notepad icon under the start>programs>accessories>notepad, then skip the next paragraph and move on.

In order to get notepad even when it is blocked, you need to do just one thing, which is what I am going to explain. First, make a useless file. The file can be anything from .doc to a .exe. Make sure you get this file into the "My Documents" folder of the computer. Once you have completed this, click on the file (just once) and click "file(upper part of the screen)>open with...". When the "Open With..." screen pops up, you may get a screen that asks you two things, "Use web service..." and "Browse...". You want to browse. When you get to the browse screen, click the notepad icon, then click "OK". Click on the new text file twice to open notepad. There should be a whole bunch of characters on the screen, and you dont want these. Just goto "File>New" to get a whole, clean, grand spanking new text document. Save this "as" "notepad.txt" on the desktop. You now have the notepad feature "hacked" onto the desktop. Continue onto the next step...

Ok, open the command prompt using notepad you open notepad up and type "command.com" or "cmd". "Cmd" might not work if you have certain restrictions but "command.com" should always work. Save the file to the desktop as "command.bat". Make sure you include the ".bat" otherwise this step cannot be completed. The file should be saved to the desktop and look like a windows app window with gears in the middle. Click the file and goto the first step to change the passwords .

Like I have already said, this way might not work on certain Windows Xp computers and you would have to use the iso image way. Anywho, I know that this tutorial looked intimidating at first, but I bet it was worth it!! Always remember that in order to become a hacker, you have to do a lot of reading

Stay Highly Anonymous


Lets pretend for a moment that the Internet is made up of 26 websites, A-Z. The web filter blocks your browser from accessing sites X-Z, but not sites A-W. Simply make the browser think you--„¢re going to A-
W. There are a variety of ways to do this:


Proxy Servers:
This is a list of http proxies. These sites may not be up forever, so you may need to search for --“free http proxy--� or --“public proxy servers--� or other similar terms.

Proxy server lists:
-- http://www.aliveproxy.com
-- http://www.multiproxy.org
-- http://www.publicproxyservers.com/index.html
-- http://www.tehbox.com/proxy
-- http://www.proxz.com
-- http://www.proxy4free.com/index.html
-- http://free-proxies.com

Now that you have a list of proxies, you would open IE (internet explorer) and click on Tools > Internet Options > Connections > LAN Settings > Advanced. Enter the address and port of one of the servers from the list in the proper area (http) and make sure the --“use a proxy server for your LAN--� option is selected. Remember to replace the proxy and port at your terminal to the original when you're done.

*Note: Some proxies listed may not work, and this method may decrease your surfing speed. By trying various entries, you--„¢ll find one that works, or works faster.

The infamous translation trick:
Go to a web page translation site and use their services to --“translate a page to English--� thus accessing the blocked page through their trusted site.

You--„¢ll notice that several translation sites are blocked, but by using less popular ones, this method can still be effective. Here is a list of some translation services. Again, these sites may not be up forever, so you may need to search for them.

-- http://babelfish.altavista.com
-- http://world.altavista.com
-- http://translation.langenberg.com
-- http://freetranslation.com/web.thm

Url Scripting:


Url scripting is the easiest method. It works on a select few web filters and is based on the same principal as the translation trick. By typing and address like --“www.yahoo.com@www.restricted_site.com the filter will not go into effect as it recognizes the trusted site (in this case yahoo.com)

Other tricks:
Simply open the command prompt and type:
Ping restricted.com ? restricted.com obviously being the restricted site
At this point you can take down the IP address (ex. 216.109.124.73) and enter it into the browser. If access to the command prompt is also restricted, see --“How to bypass restrictions to get to the command prompt.--� If this article has been taken from information leak, then know that it involves anything from opening the browser, selecting view > source, then saving it as X.bat and opening it to opening a folder or browser and typing in the location of cmd.exe depending on the OS. I will not go into further, as this a completely different topic.

Use https://restrictedsite.com as referring to it as a secured site may confuse the filter.

Note: These are ancient methods that many new filters defend against, but still may be applicable in your situation. If not, a little history never hurt anyone.

Web based Proxies:
Another one of the easier, yet effective methods include web based proxies. These are simple in the fact that you just enter the restricted address and surf! Some of these have some restrictions, like daily usage limits, etc but you can also use another proxy (perhaps one that sucks, like a text only) to bypass their restrictions as well. Here is a list of some:

-- http://proxify.com]http://proxify.com
-- http://www.anonymizer.com/index.cgi]http://www.anonymizer.com/index.cgi
-- http://www.guardster.com/]http://www.guardster.com/
-- http://anonymouse.ws/anonwww.html]http://anonymouse.ws/anonwww.html
-- http://www.the-cloak.com/login.html]http://www.the-cloak.com/login.html
-- https://www.megaproxy.com/freesurf]https://www.megaproxy.com/freesurf
-- http://www.anonymizer.ru]http://www.anonymizer.ru
-- https://nadaily.com/cgi-bin/nph-proxyb.cgi]https://nadaily.com/cgi-bin/nph-proxyb.cgi
-- http://www.userbeam.de/cgi-bin/nph-userbeam.cgi]http://www.userbeam.de/cgi-bin/nph-userbeam.cgi
-- http://www.free2.surffreedom.com/nph-free.cgi]http://www.free2.surffreedom.com/nph-free.cgi

Proxy Programs:
There are many proxy programs that allow you to surf anonymously that are more or less based on the same topics we--„¢ve covered here. I--„¢ve added them just to cover the topic thoroughly:

-- http://www.hotscripts.com/Detailed/28480.html]http://www.hotscripts.com/Detailed/28480.html
-- http://www.inetprivacy.com/a4proxy/anonymous-grc.htm]http://www.inetprivacy.com/a4proxy/anonymous-grc.htm
-- http://www.orangatango.com/home/index.ie.html]http://www.orangatango.com/home/index.ie.html
-- http://www.steganos.com]http://www.steganos.com
-- http://www.anonymization.net]http://www.anonymization.net ? toolbar that requires admin rights to install

Making your own CGI proxy server:

Making your own proxy server may come in handy, but I personally find that simply uploading a txt file/w a list of proxies to a free host makes for a much easier and headache free solution. If you don--„¢t know PERL, there is code out there to help you set it up. Check out these sites for more info:

-- http://httpbridge.sourceforge.net]http://httpbridge.sourceforge.net
-- http://www.jmarshall.com/tools/cgiproxy]http://www.jmarshall.com/tools/cgiproxy